
I thought I’d try something new today for the New Year to sort of break up the habitual routine! Today I will be posting one of a two part series blog for the Cuttlebug.
Cuttlebug by ProvoCraft is one of my first significant purchases in all my gears. Purchasing this gear actually made me realized how much I miss papercrafting. The Cuttlebug conveyed my passion for designing through papercraft and from that moment forward my creativity was no longer dormant. I hope that you have a gear or gadget that holds a deep significance value like the Cuttlebug has been for me.
Part 1 of 2 Dry Embossing
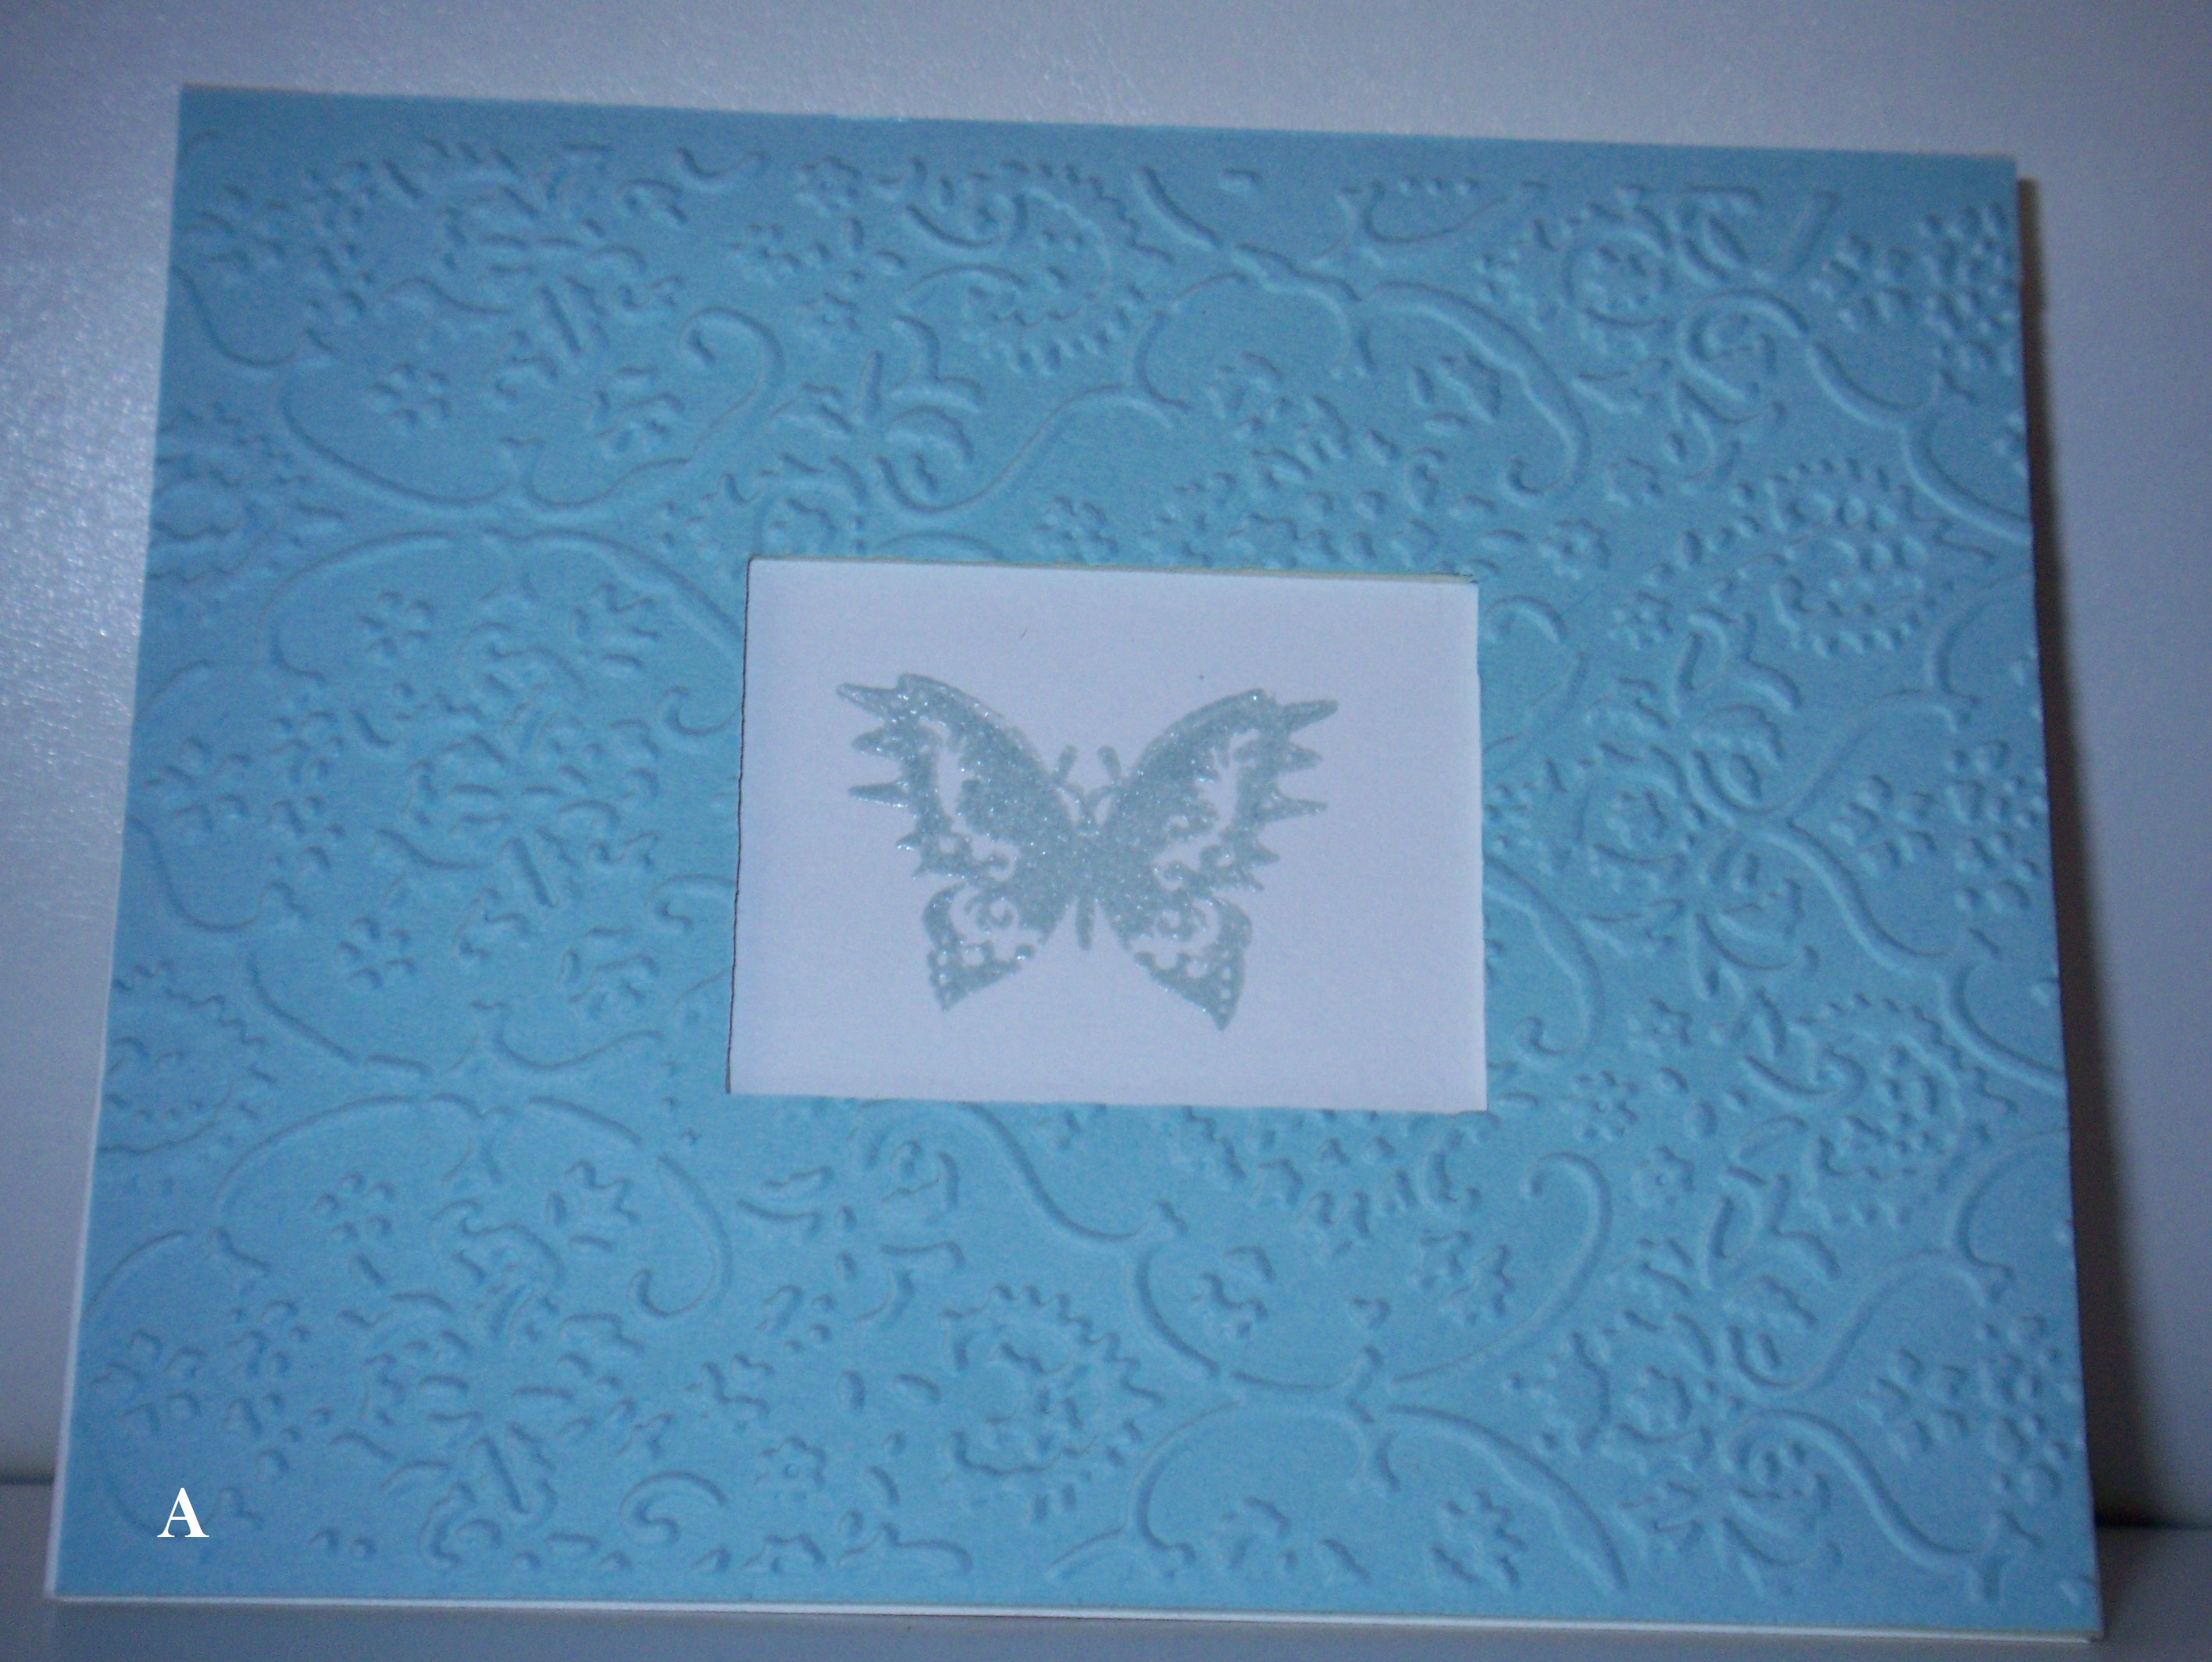
Dry embossing has similar effects like the embossing powder but dry emboss yields a more pronounce texture and dimension to your project. (See Image A)
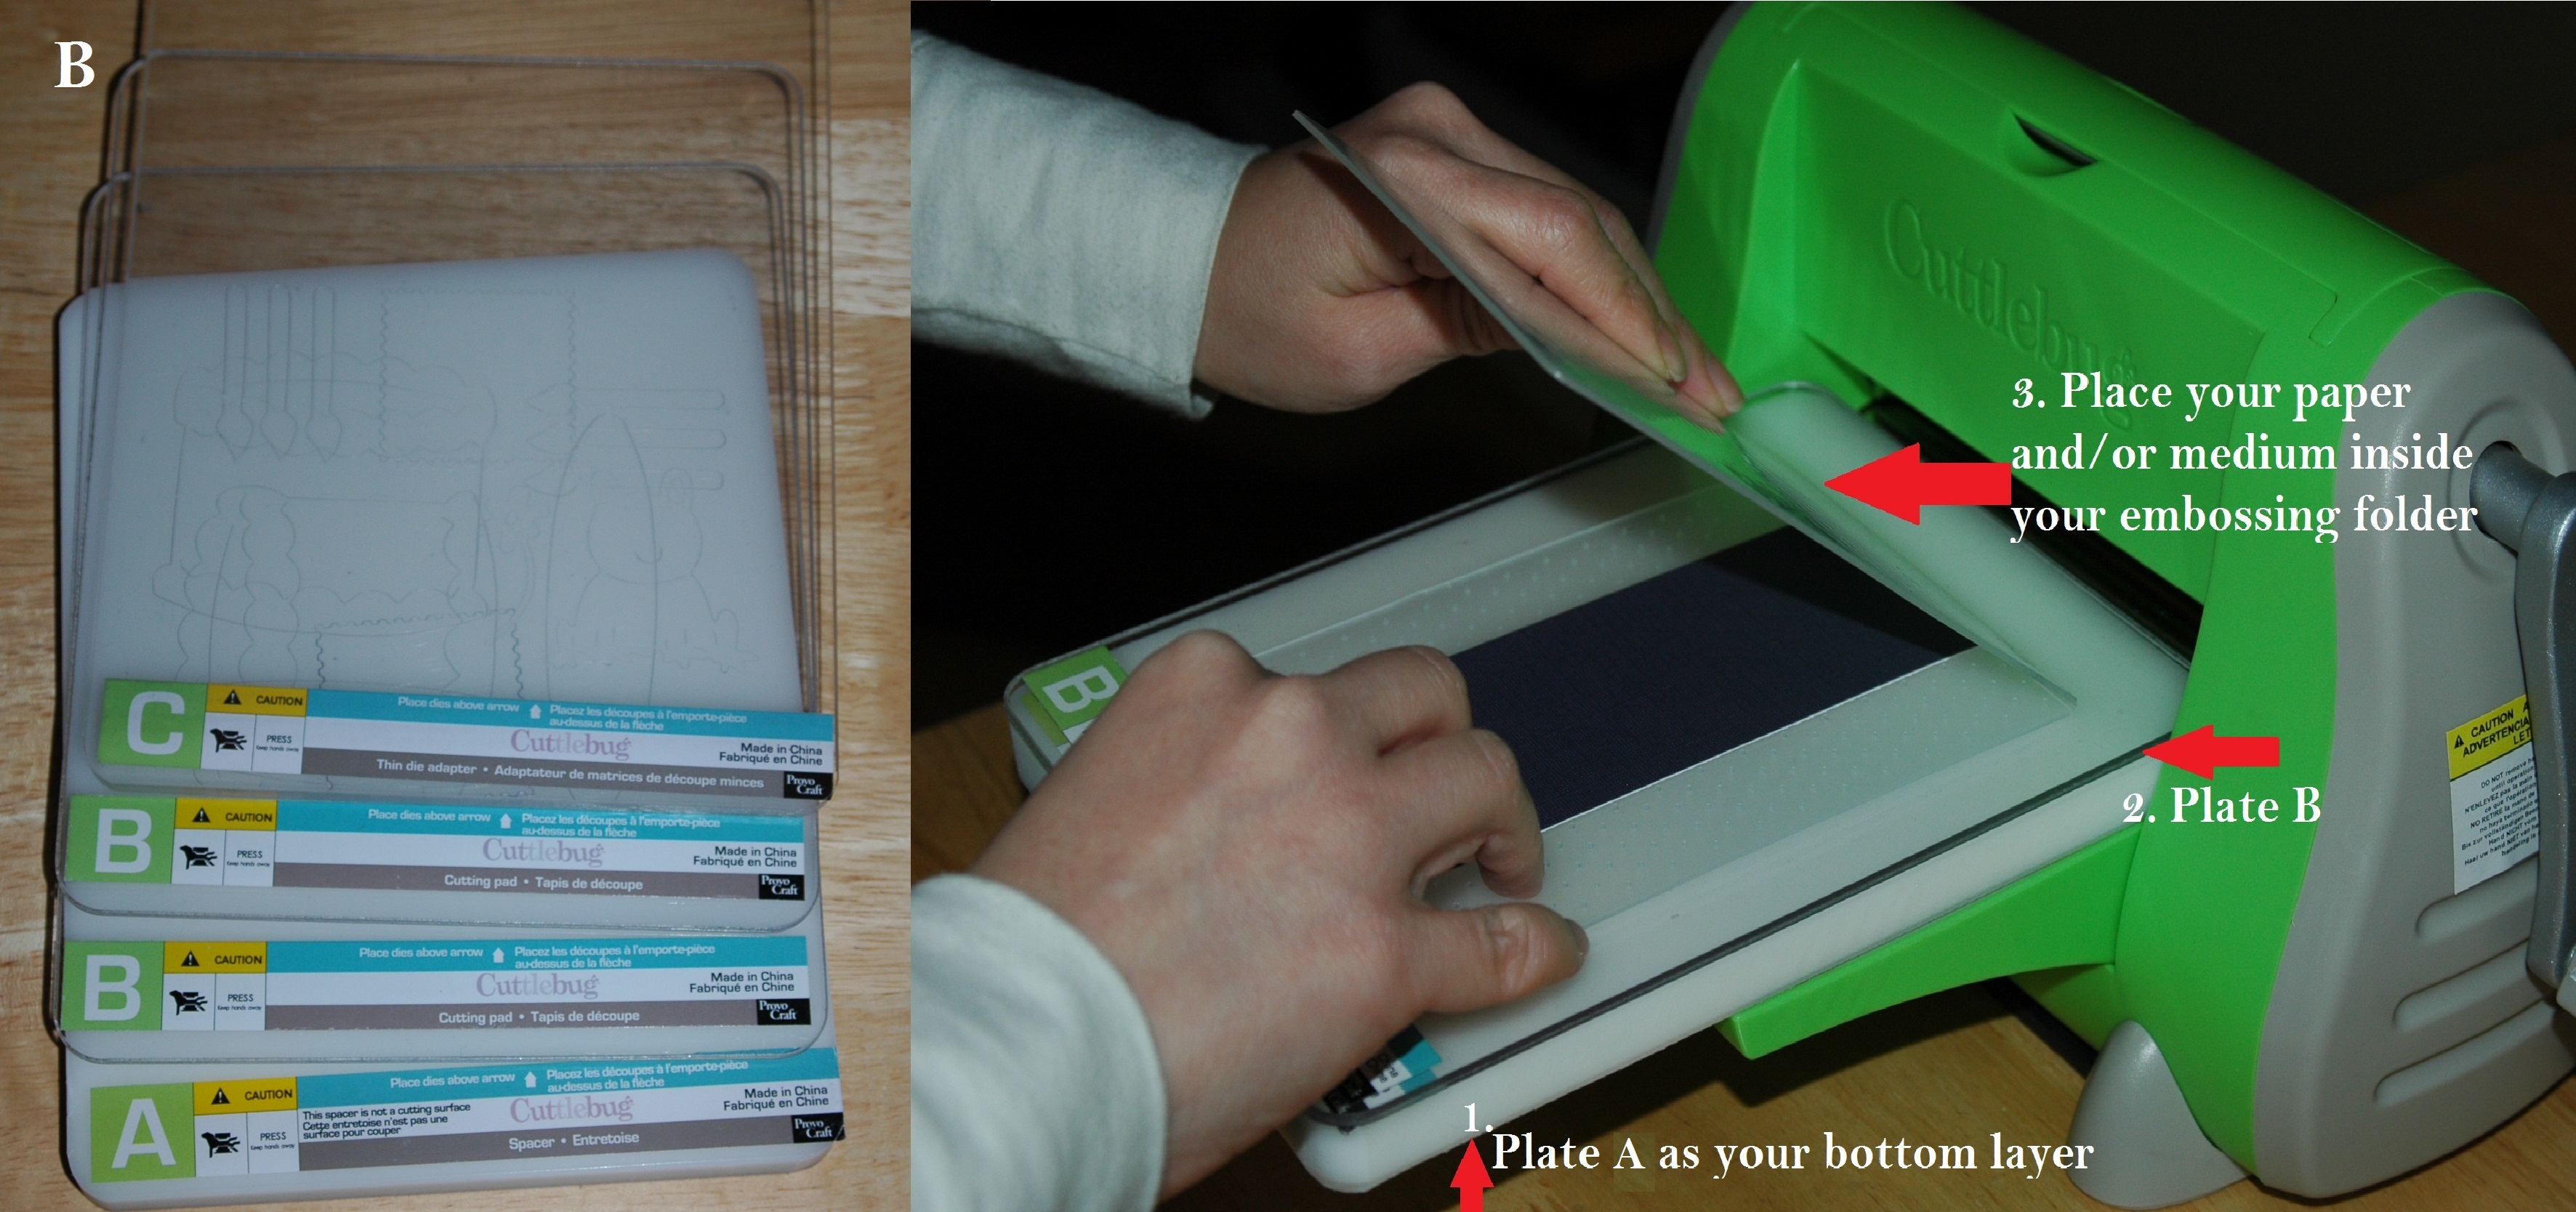
The Cuttlebug itself includes four plates (embossing folders sold separately): one spacer (plate A) and 3 cutting plates (Two B plates and one C plate). To dry emboss place plate A as your bottom layer follow by Plate B then your embossing folder (with your paper and /or medium placed inside the embossing folder) then place your 2nd B plate as your top layer. (See image B)
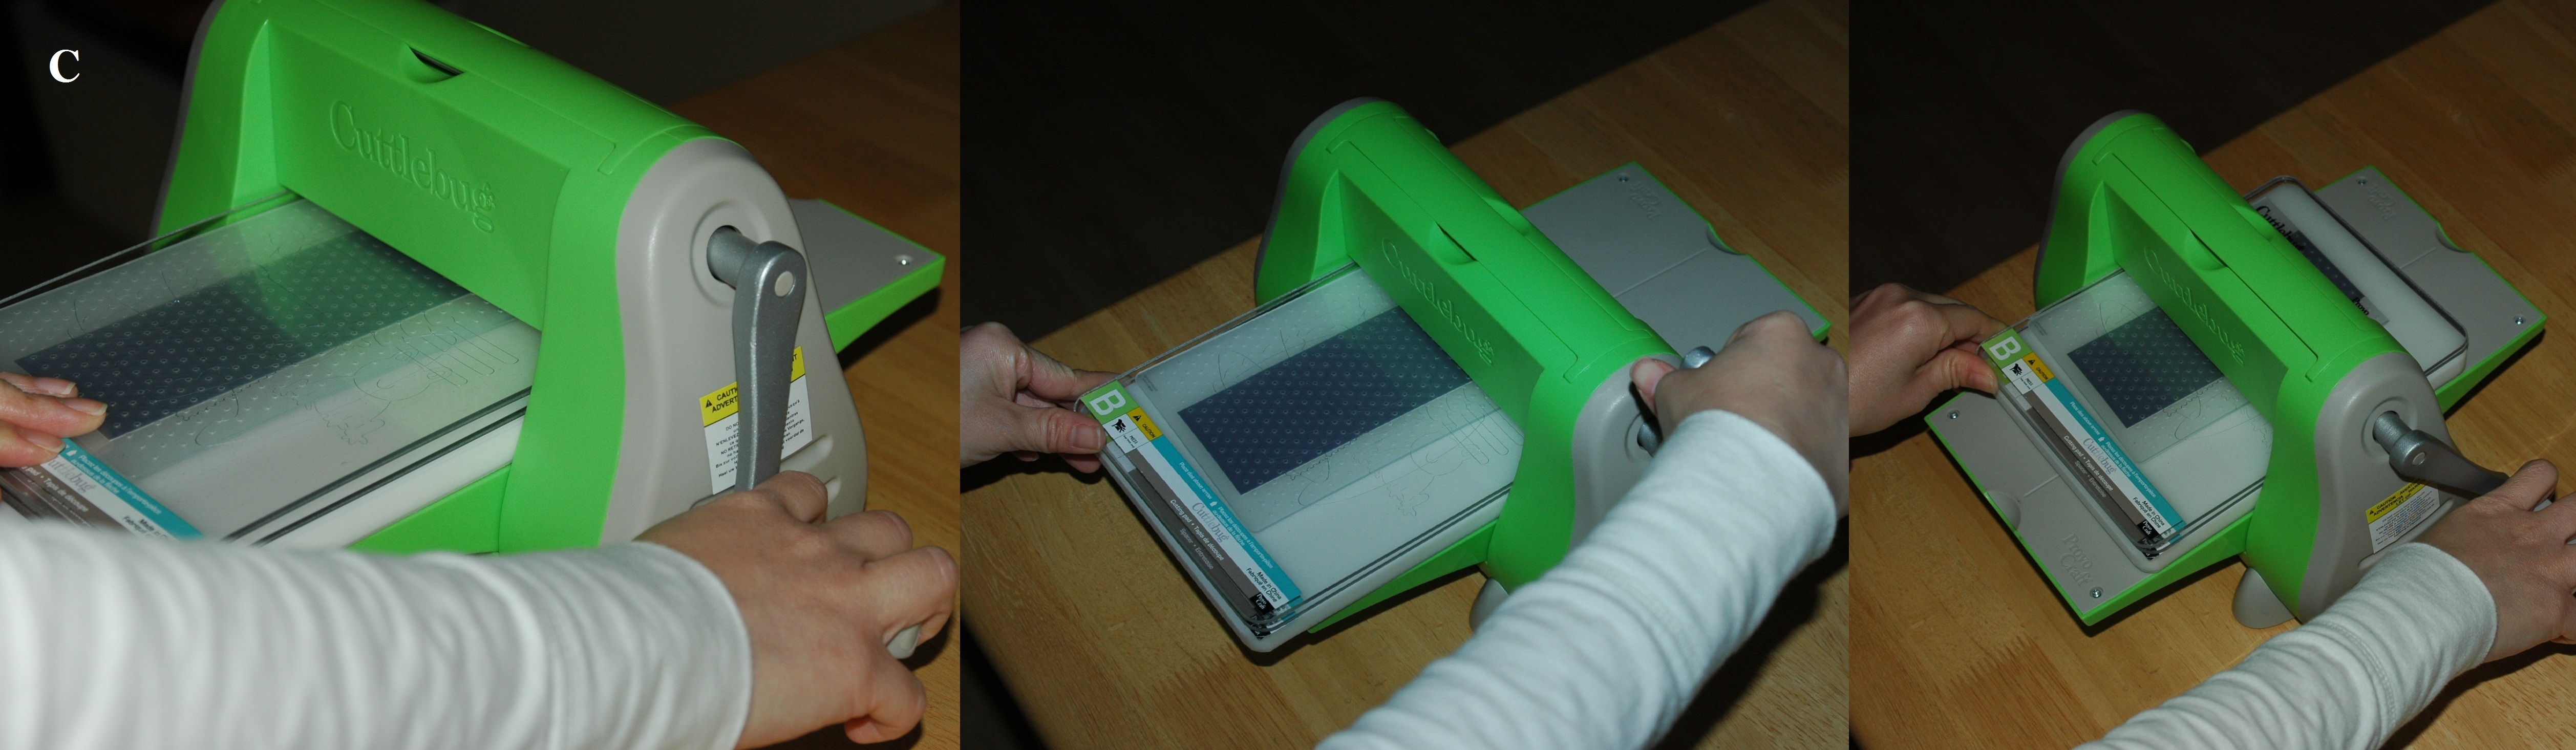
Feed the plates and simultaneously turn the handle to help feed the plates completely through the opposite end. (See image C)
The result is quite impressive, see image A. The unit is also compatible with other brand name embossing folders/plates like Sizzix and Fiskars. Therefore the dry embossing function earns 5 out of 5 stars. Thanks for reading and be sure to join me again as I conclude my part 2 of 2 mini blog series.
